Dispart is the latest version of fdisk which is a command-line utility that you can use to manage disks, partitions, or values in the system running all versions of OS since the first Windows release including the latest release. We have put together the most used and common DiskPart Commands for Windows 11 along with their examples for you to learn. They are also available in PDF format to save.
Today we can input these commands and organize hard disk partitions, create text file scripts and format volumes. For those who do not know, remember that many of these operations performed in the disk management tools are integrated into DiskPart.
How to Open DiskPart in Windows 11
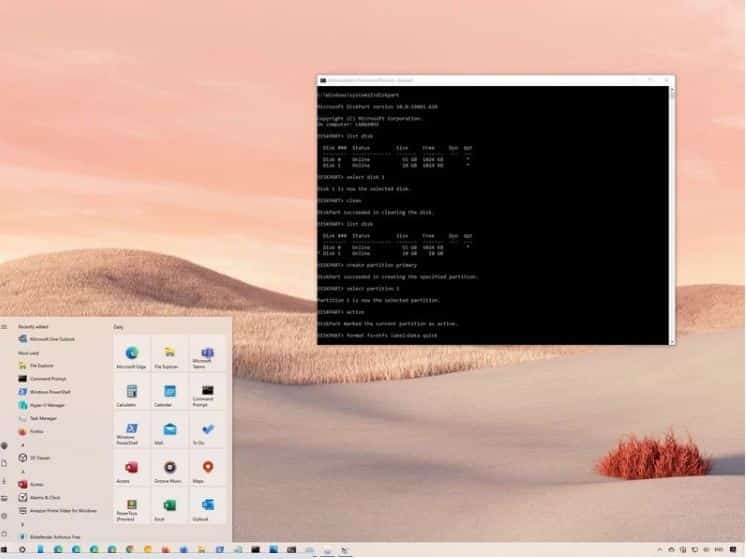
- Launch Windows 11 CMD with administrator permission.
- In the search box type in “DiskPart”, as it appears right-click on it and select “Run as administrator”. Alternatively, you can press “Windows logo + R” from the keyboard and then hit “ok”.
Windows 11 DiskPart Commands with Examples
Now, making this in use you first need to select an object to give it focus, once done any command typed in shall act on the particular object.
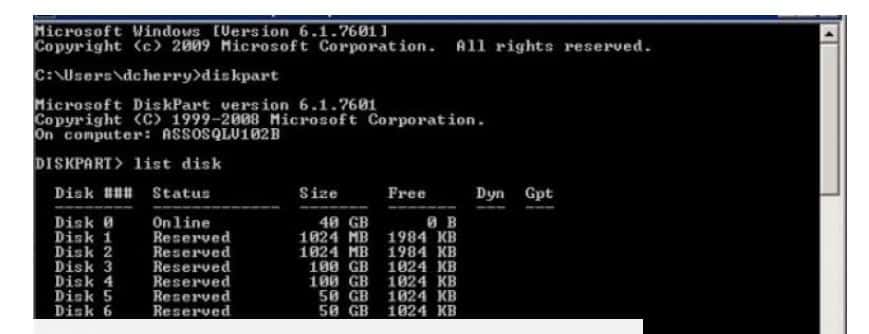
- At DISKPART> prompt, you need to type in “list disk” in order to display all the disks in the system.
- Each shall come with a certain number of disk beginnings with 0.
- (*) asterisk there under GPT row means that the disk is of GPT partition style.
- Now if there is only one disk then you need to tell it which disk needs to be managed by using the “Select Disk n” command to give it focus. Now, n is used to represent a number of disks.
- At DISKPART> prompt, you need to type in “list volume” in order to display the volumes of all disks.
- Each shall have a certain number beginning with 0 which starts with zero. Type in “select volume n” to tell it which volume to manage and give it focus, in this n can be the volume number or drive letter of the volume if it has.
- To see what DiskPart can do for you, just type in help in order to see the command list.
We have taken some common commands which it uses as examples for some further understanding.
Managing your disk volumes
As when selecting volume, the focus remains on it till a different volume is selected, the “select volume” command might not be used in all the operations. Moreover, the examples are usually performed one after another plus the last operations effect shall be viewed in the next operation. Now, if you intend to perform only one operation then you need to select volume before using the corresponding command.
Note: Make sure to hit “enter” every time you type a command to apply it.
Deleting Volumes
For this you need to use the following commands:
- List volume
- Select volume 7 (In here take G: drive for example)
- Delete volume
After this, you shall get a message which says:
Successfully deleted the volume
Note: Any volume which carries the active paging file or crash dump, system volume and boot volume cannot be deleted.
FEATURED: Disable and Turn Off Hibernate in Windows 11 from CMD.
Creating Partitions

For this see the following command:
Create partition primary size=22500
After this you shall get a message which says:
Succeeded in creating the specified partition
With the above command, we can create a 102400 MB, a 100 GB primary partition. To create others all you need to do is replace the primary with one of the following:
Note: There should be unallocated space on the disk to create a partition.
ALSO CHECK: How To Use Quick Access Toolbar in Windows 11.
Formatting Partitions
You need to type the list volume command and see that the new partition which is created is RAW which means that we need to format the partition before it can be used. Now, to format a partition you need to refer to the command below:
Format fs=ntfs label=”DekiSoft” quick
After this you shall get a message:
Successfully formatted the volume
With the command mentioned above, you can perform a quick format on the partition, it shall be formatted with the NTFS file system and also labeled as Windows 7. Now, make another file system partition such as FAT, FAT32 all you need to do is replace NTFS with fat or fat32. Give the label any name you want.
Keep in mind that DiskPart is not able to format 32GB+ partitions to FAT32, now to format a larger hard drive to FAT32 you need to run a third-party partition manager.
Assign a Drive Letter
Partitions not having a drive letter shall be hidden under “file explorer”, to assign one to an existing partition you need to refer to the command below:
assign letter=F ( in this you can replace F with some other letter that has not been used yet)
After this you shall get a message that says:
DiskPart successfully assigned the drive letter or mount point
ALSO CHECK: How To Open Folder Options in Windows 11.
Extending your Partitions
For this you need to see the following command:
Extend size=10256
After this you shall get a message says:
DiskPart successfully extended the volume
This command means to add in 2048MB which is 20GB to volume 6. Now, if no size is given the contiguous unallocated space on the right side shall be added.
Note: Contagious unallocated space must be on the ride side to extend the partition.
- Shrink Partition
For this refer to the command below:
Shrink desired= 11000
After this you shall get a message which says:
Successfully shrunk the volume by 11 GB
Note: You can reduce volume size only if it is formatted with help of using the NTFS file system.
Active
After this you shall get a message which says:
Marked the current position as active
ALSO CHECK: Turn Off Microsoft Account Syncing in Windows 11.
List and clean your drives
These need to be MBR and GPT conversion. On a disk, if you want to delete all partitions or volumes and also convert the disk between MBR and GPT refer to the commands below:
#1:
List disk

#2:
Select disk 2


#3:
Clean

#4:

“convert got” or “convert mbr”
DiskPart Commands PDF
If you want a hard copy or get this printed to attach in your office or home, feel free to do so.
DiskPart Commands List for Windows 11 (PDF)
Concluding
DiskPart has always been the best disk partitioning tool for Windows. This is why we have created a guide on all the Windows 11 DiskPart commands and working examples for listing drives, formatting and creating them. We have also saved it in a PDF file that you can keep or print locally for knowledge or guidance when needed.




where is info about creating a logical partition
Hi Oscar, can you please look at the Creating Partitions section.