
You may have noticed colors on your screen not being right while watching a movie or editing pictures. Some monitors are naturally bright, whereas others carry saturated colors. This helps to set colors to meet a standard and makes everything look much better. This article will show you how to calibrate your monitor for better colors in Windows 10/11, get ready to treat your eyes as they should!
Calibrate Your Monitor for Photography and Gaming in Windows 10 or Windows 11
- Go to settings.
- Then display.
- Select the calibrate display color.
- After this follow the steps to set gamma, contrast, brightness, and colors.
This can be done with the help of online tools as well.
Note: make sure to turn the monitor on for 30 minutes at least before adjusting it, this makes sure that it has warmed up and is displaying its normal colors and brightness.
- From the bottom left corner of the screen, click the magnifying glass icon.
- In the Windows search bar type in “Calibrate display color”.
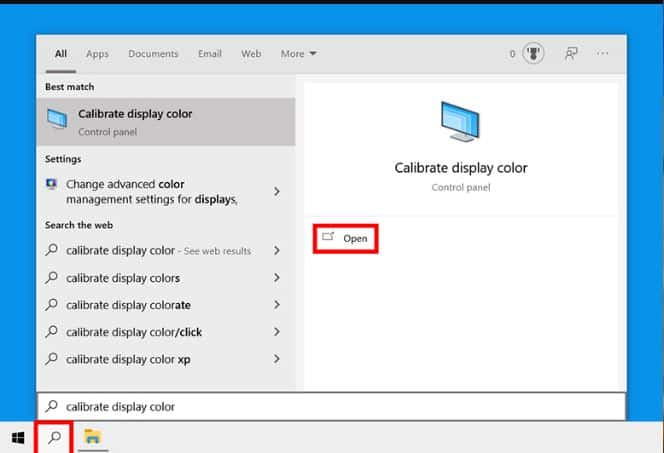
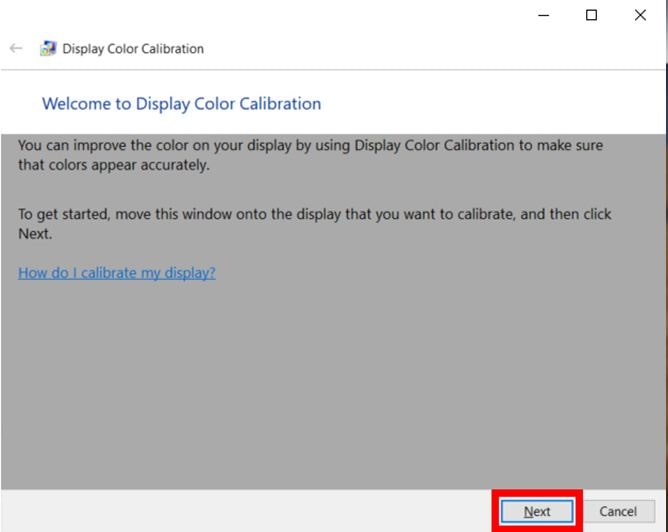
- After this click open, a new window shall open which says welcome to display color calibration.
Note: If you are using more than 1 monitor then be sure to drag the window to display if you want to do this.
- Select next, to begin with, the process. Between each of the steps, you need to click next.
Note: Be sure to set our system monitor to factory settings otherwise better results won’t be displayed. To do this, use the button present on the front, side, or back. If it lets you set the gamma, then set it to 2.2 or as close to it as possible.
- It would be best if you used a slider to adjust it. For this, move until dots in the middle of the image appear less visible. This shall change both the brightness and color of the screen.
Note: If you cannot make the center disappear completely, you do not need to worry. You can also use a gamma correction test image if you want a better way of testing.
Make as many numbers appear on the top and bottom bars as possible. You shall be able to see 6 numbers in every bar with better monitors whereas lower grade monitors shall show 4 numbers in each row.
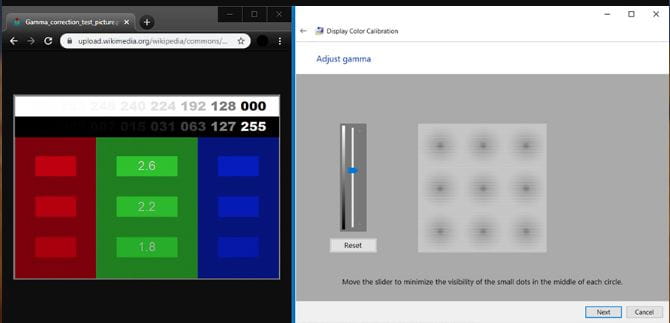
Tip: If you cannot adjust the slider, you need to change gamma settings using the monitor’s control. While doing this keep both display settings windows and gamma correction image test open.
- You need to adjust the brightness after this. For this, use control buttons on your monitor until you see the shirt and image in the picture, but not too much that X stands out from the background. You could see it, but the wall behind it must not have been washed out.
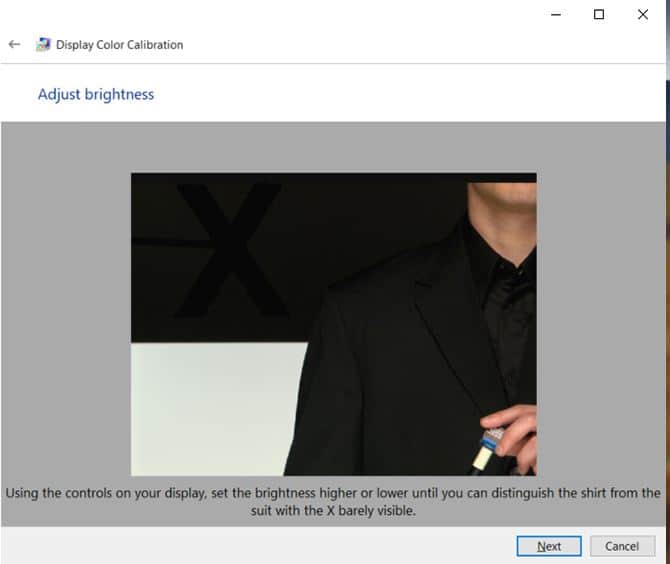
Note: Your screen shall look different Depending on the angle you are looking for. Look at your monitor from far away for some of the best results.
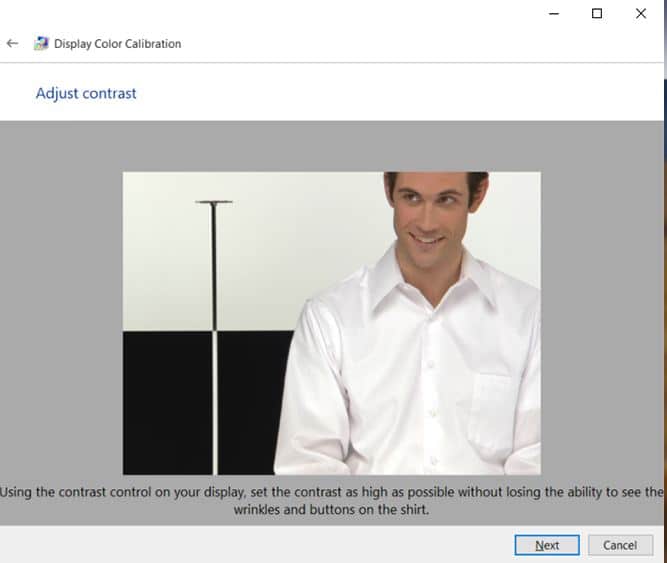
- After this, you need to adjust the contrast. For this use buttons on your monitor. You want to set a contract so you can only see buttons and wrinkles on the man’s shirt. Remember that the image’s background should not be bright white.
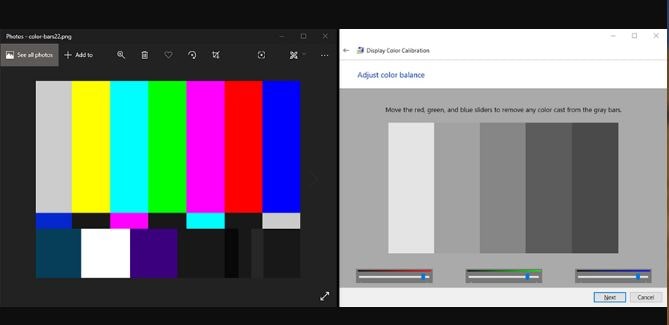
- Adjust colors after this. For this, you need to use sliders from the bottom of the windows till all bars get neutral gray. If this seems difficult, you can download an image of color bars and use it to see when colors are off.
READ: Save Energy on your Monitor with MOU Utility.
- Click “previous calibration and current calibration” to check whether you like the changes made. Doing this does not affect what you have done. You can always go back and change any settings. For this click the arrow in the top left corner of the window.
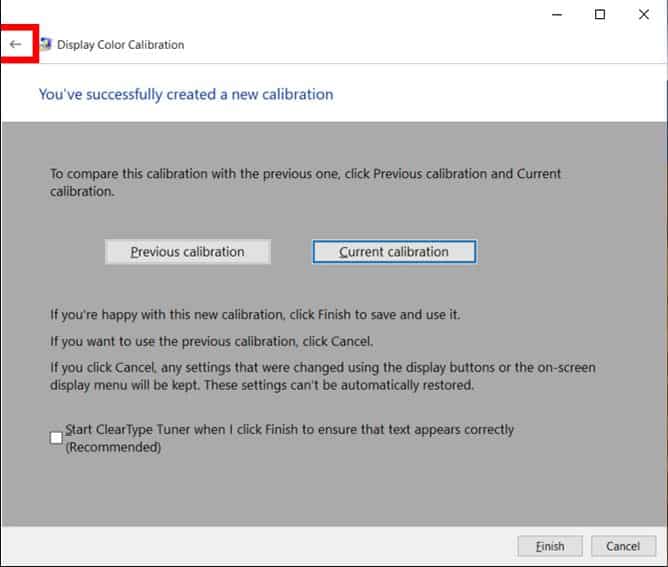
- Click finish if you are satisfied with it, if not then click cancel and start all over again. If you want the best results then do the steps again. For best results, go through the steps but go backward this time. This is because each step affects the next one thus changing order helps fine-tune calibration even more.
Note: To adjust the clarity of text, check the start ClearType Tuner. You shall be asked to do a quick test to calibrate text on careening.
READ: 10 Apps that are useful for taking notes on your PC.
3 Best Online Monitor Calibration Tools to use instead
Once you are done, some tests can be taken online to ensure the monitor shows you the best quality.
- W4zt screen color test: A website that shows color gradients for comparisons, some grayscale boxes, and tests for screen gamma. This is quick to perform and is great.
- The Lagom LCD monitor test pages: This single-page version shows you some tests for this purpose on one webpage. For this go-to site and, perform tests yourself.
- Photo Friday: This is a photo-sharing site that comes in free but also offers a free tool. The test is shorter than the ones mentioned above, but you can use it to see whether your screen has the correct brightness and contrast.
Your turn
In this guide, we have highlighted how to calibrate your monitor in Windows 10/11 for better photography colors and gaming. I recommend you do this as this also helps your eyes relax.


 Free Download For Windows 10/11")
")

")


 Free Download For Windows 10/11")
")
")
")